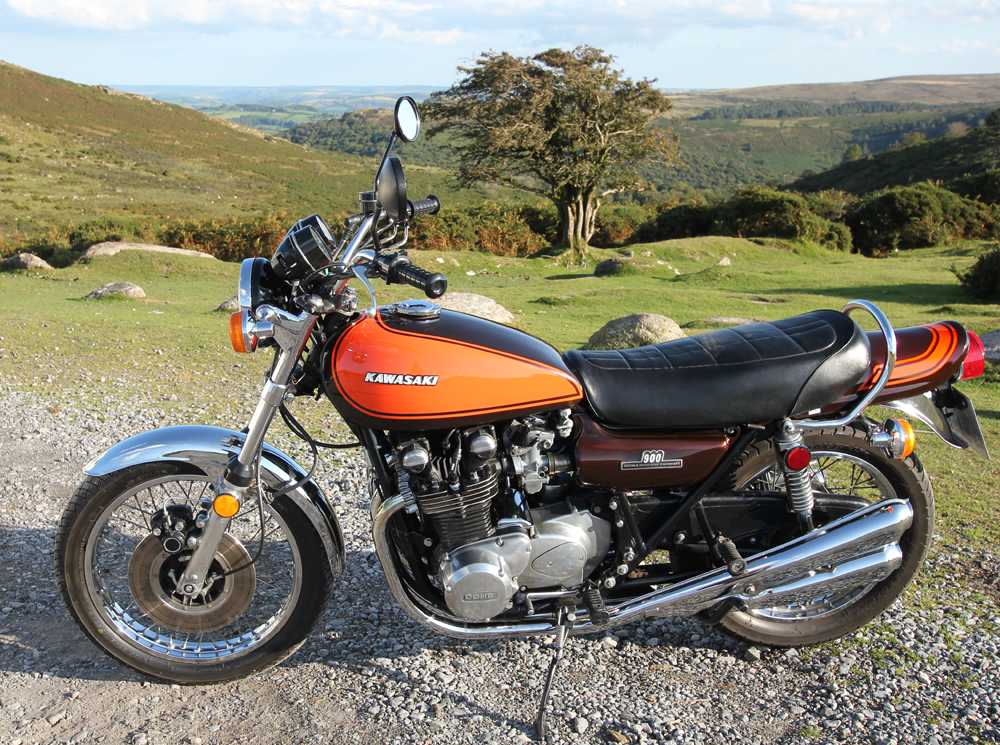
This Kawasaki Z1 900 purchase lesson comes from a sorry owner who wanted to save money and grab a bargain. They went to buy another Japanese motorcycle from someone who was highly regarded in the owners club and picked up that bike. While they were in the seller’s garage they noticed a nice shiny, freshly restored 1872 Kawasaki Z1 900. Unfortunately, the seller said it wasn’t for sale as they’d spent years and an absolute fortune restoring it and they’re keeping it. After much cajoling and haggling he also left with his 1972 freshly restored Kawasaki Z1 900, which he was told was all original, for just £25,000. He loaded the two bikes, got them home and in the morning went out for a ride on his Zed, which was very reluctant to start, but eventually fired up. He gave me a call and asked me to pick it up to sort out poor running, a blowing headlight and bad handling. When I arrived I pointed out that it was a 1973 and not a 72, he said the seller told him it was definitely a 72 which is worth a lot more. He told me the bike was restored with genuine parts and was built by someone very high up in another Japanese motorcycle brand’s owners group. These type of situations are not enjoyable, as such wily bargain hunters prefer to shoot the messenger rather than feel anything but love for the nice man who ripped them off. His face dropped when I pointed out that everything on the bike was replica and he’d paid way too much for a 1973 with no coded date stamped parts. I tried to get it started but it wouldn’t stay running so I loaded the bike on the van, pointing out the flaking barbecue paint falling off every area of the motor. He said it shouldn’t do that because it had only done about five miles since the restoration, so I did point out that barbecue paint is for barbecues, not motorcycle engines. This is a sorry tale about a Kawasaki Z1 900 purchase lesson we’re relating to prevent others from similar folly, not to scare prospective buyer. You get what you pay for and there are plenty of nice men willing to take your money who can impress with their non existent credentials.
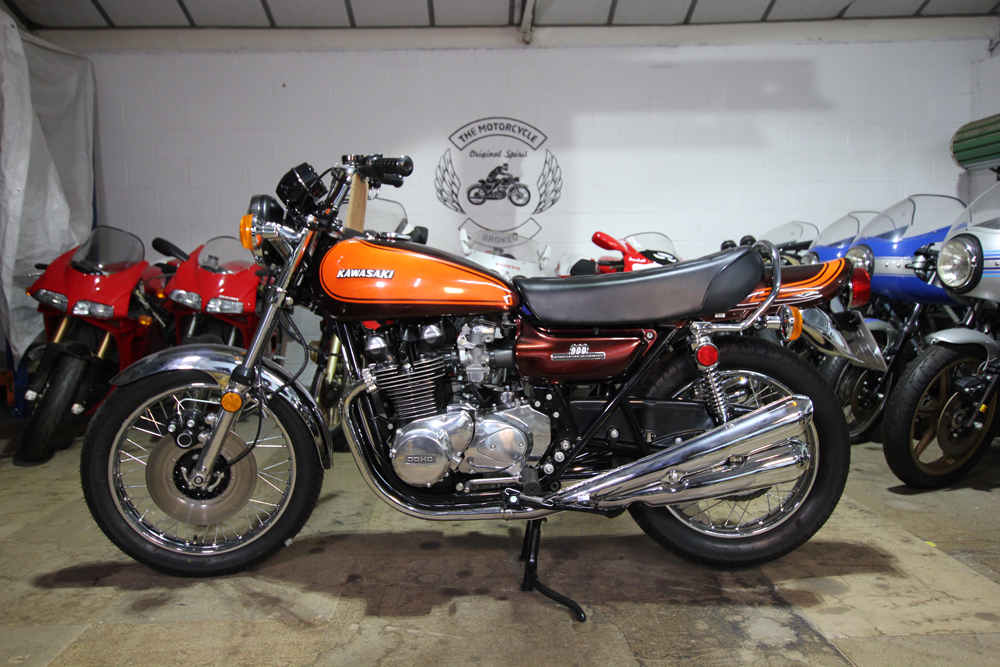
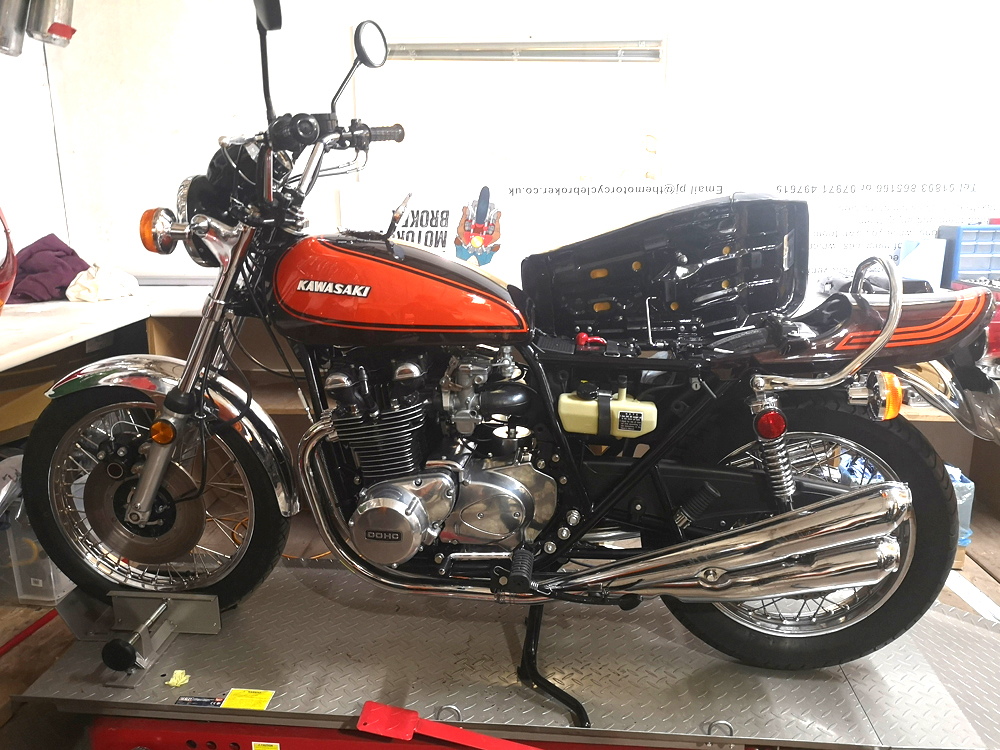
Shiny restoration of a Kawasaki Z1 900
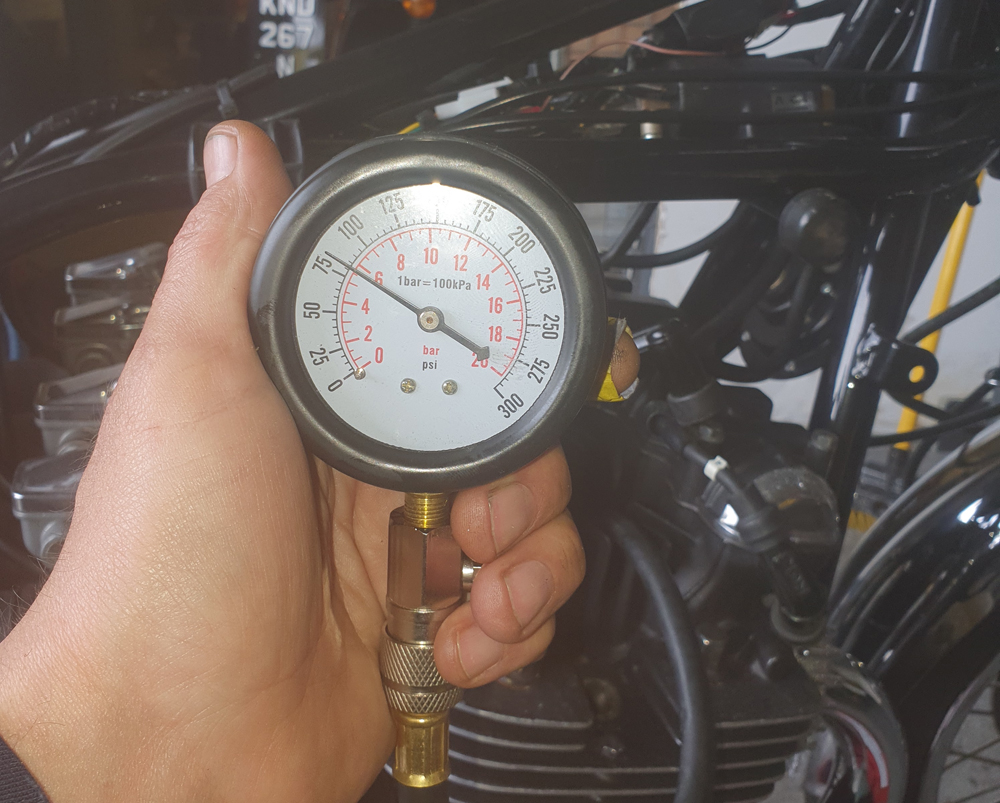
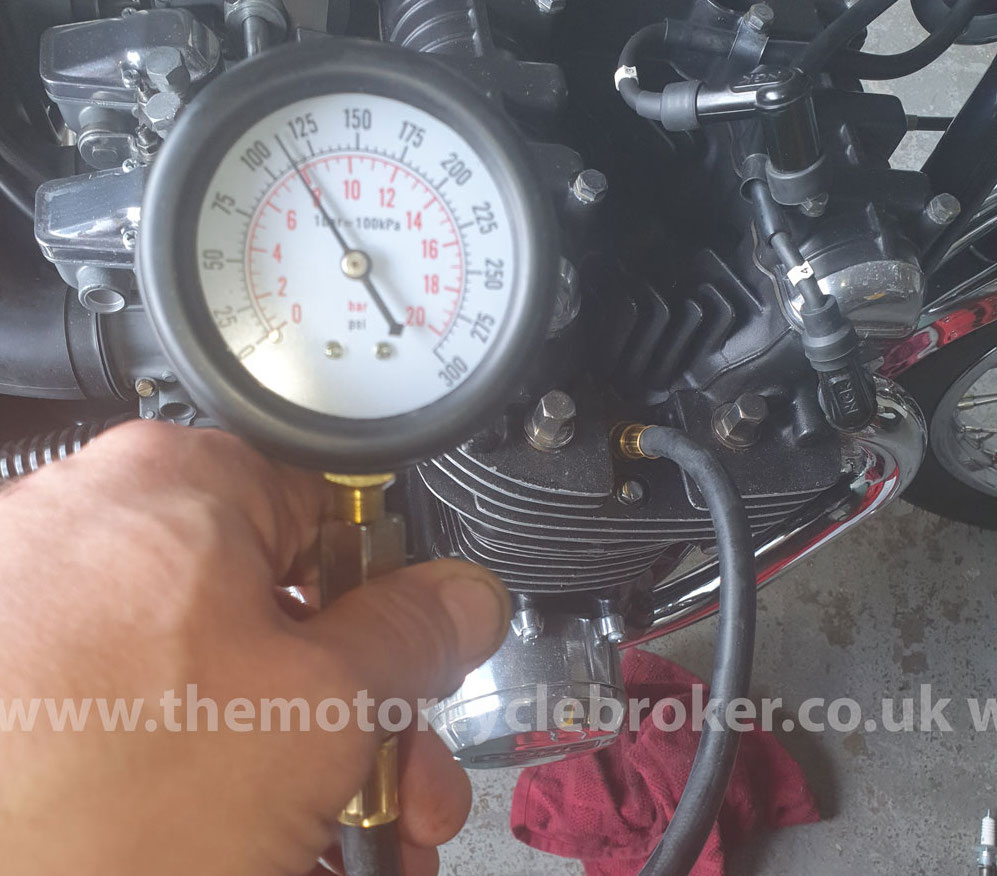
This was a typical shiny restoration of a Kawasaki Z1 900 which shone to deceive. The frame was powder coated, the replica bodywork was obvious and the wrong colour. He told me how it must only be something very small causing the poor running because the guy who restored it was head of a Japanese motorcycle owners club and restored the bike for himself personally. We could not get the bike running at all, we had a quick look at the carbs and points which seemed alright, so we did a quick compression test. With only 80 PSI on two cylinders, 115 on another and 120 on the other, he agreed to us removing the cylinder head, which was from the wrong year machine, as was the cylinder block and carbs. Once we removed the head we noted that the “engineer” who built the bike had done so with bent valves on two cylinders and had failed to gap the piston rings after reboring the motor. They had also used the worse possible, cheapest piston rings. The oil ways looked clear in the top end, but we could not verify what the state of the bottom end was without stripping the rest of the motor. The owner only wanted us to only do the top end and not strip or investigate the bottom end at all, against our advice. The cam carrier cap on the left side of the exhaust camshaft was split, which is a serious problem. This sorry tale of a Kawasaki Z1 900 purchase lesson still has more twists and turns that don’t lead to joyful knees down.
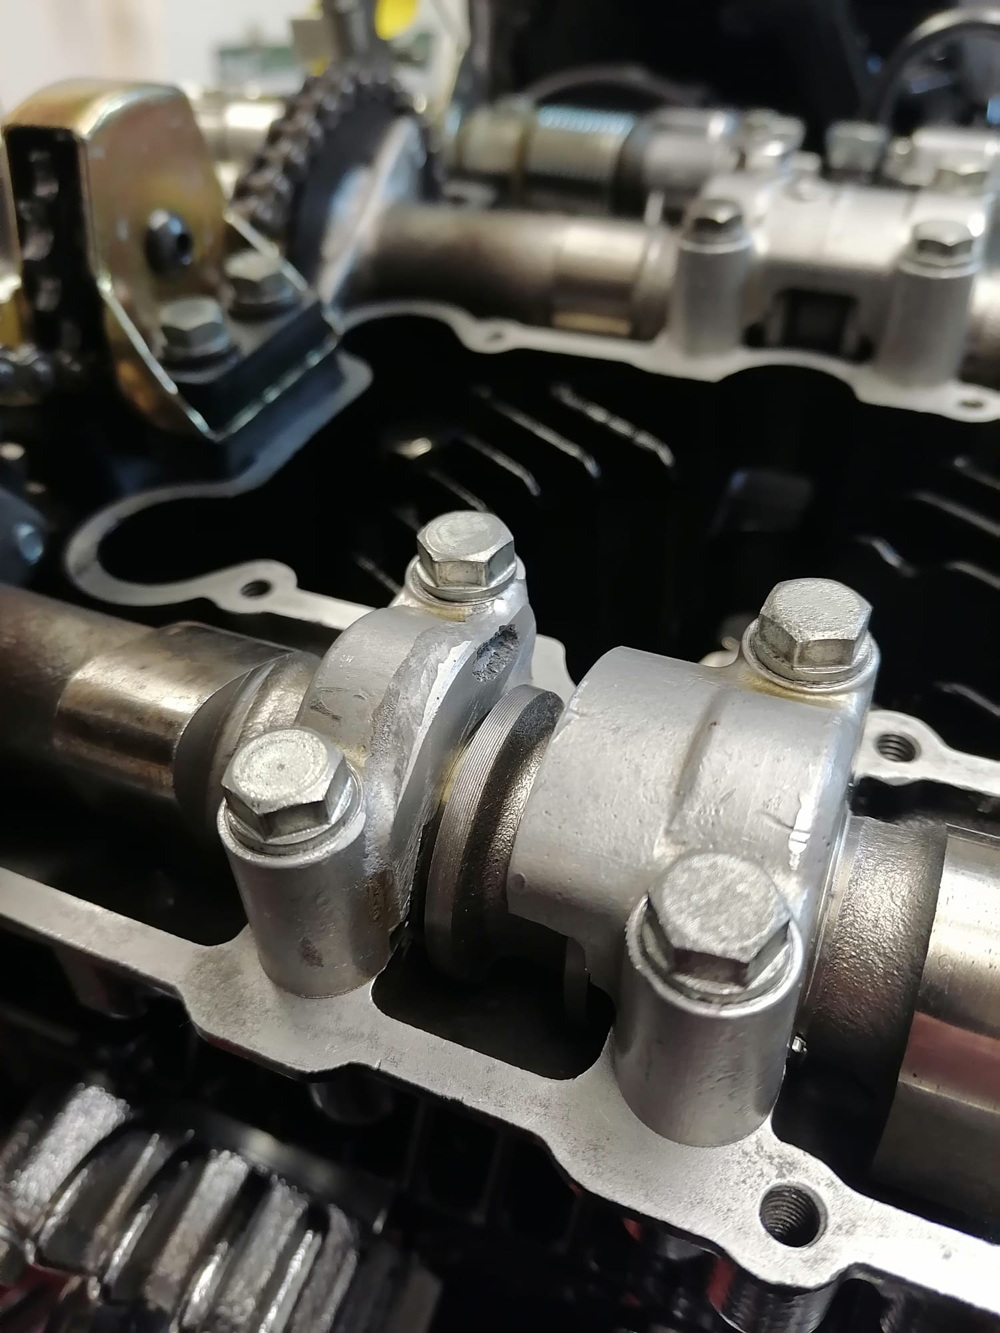
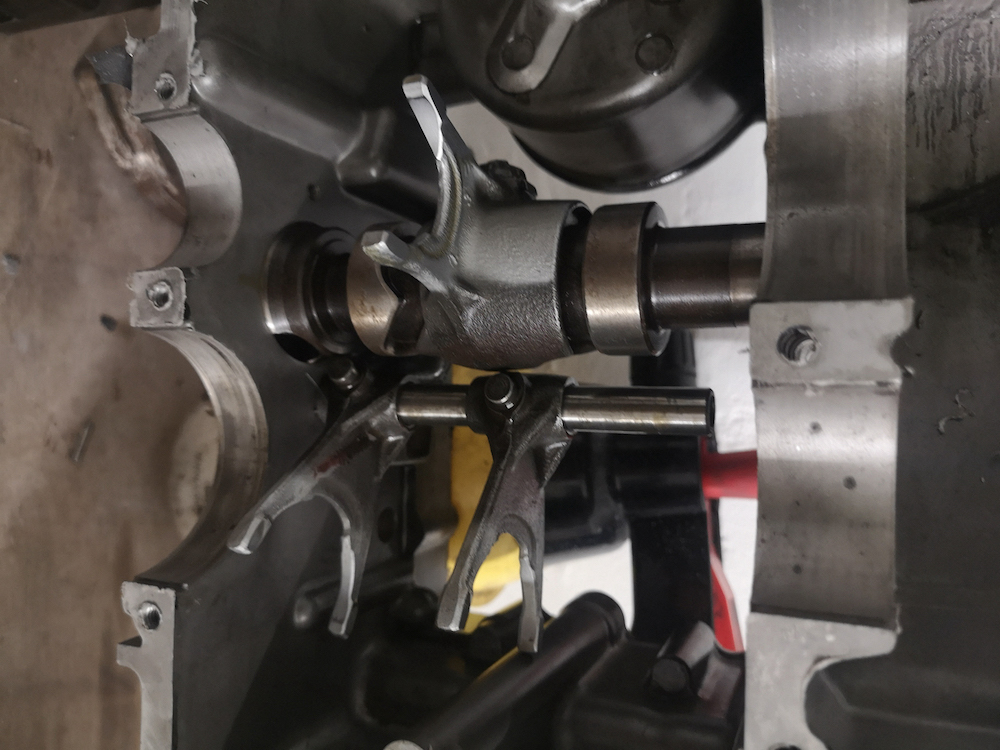
Engines should be built by people who build engines
These engines should be built by people who build engines, not by someone who runs a motorcycle club at weekends and builds kitchens during the week. These motors have four cam carrier caps which hold the camshafts in place. The home mechanic will torque them down according to the manual and the carrier caps will split, just like the one in the photo below from this motorcycle in question. The heads, cams and carrier caps were all bored together, so making a repair is extremely costly to do correctly. If the repair can’t be done correctly, then a used head, cams and cam carrier caps, which all match, have to be sourced which will cost a fortune, if they can be found. The problem is caused by people building these motors who don’t have experience of building them and how to do it correctly, which is not covered in any manuals. Building any motor correctly takes quite some time, but throwing them together can be done very quickly. No one would think about doing brain surgery on themselves, yet they’re prepared to do over 70 MPH on their own motorcycle with no training or industry experience. We explained the problem with the cam carrier cap clearly to the owner, but he wanted us to just put the motor back together as was so it runs. We really wanted to convince him to agree to us stripping the bottom end while the top end was off, but he refused and we had a feeling this sad Kawasaki Z1 900 purchase lesson had many more secrets to deliver. We told him clearly not to risk running or riding it as it was, so he agreed to sign a disclaimer. When buying a Kawasaki Z1 900, always remove the rocker cover before agreeing a price.

Motor had been rebuilt with bent valves
The motor had been rebuilt, by the “engineer”, with bent valves on two cylinders where the cam chain had previously snapped. It’s a good thing that it couldn’t be run for any period of time, as the bent valves would have snapped and dropped into the motor, causing a lot of damage. Once we put it back together we struggled to get it running properly because the ignition plate for the points was from a 1974 Z1A Kawasaki Z900 which meant the ignition was way too retarded and would not time correctly. The points and condensers were super cheap and the bike could never run with them, so we replaced all of these parts with the correct items. However, we couldn’t get the Z1A carbs to run properly, which was unusual as they are much better carbs. We found a shelf bracket inside the air box, which won’t help running. The internals of the carbs were from four different incorrect motorcycles, some weren’t even Kawasaki parts at all. The linkage had quite a few pieces missing, incorrect components and lots of bent components. One of the carbs was clearly leaking with petrol stains down the side of one bowl. All of the float heights were incorrect and none bore any relevance to where they should have been set. Once we rebuilt the carbs, we managed to get the bike running and eventually got it tuned, having binned about 75% of the parts the previous “engineer” had originally already replaced, or failed to replace. Once we got it running, it was fine on A roads, but the handling was dangerous, so we found that the “engineer” had failed to put the spacer in the front wheel between the wheel bearings, among other issues. The spacer is no longer available so we had to strip one out of a machine from my personal collection and had a new one fabricated from scratch. The bike ran well and handled, so we needed to take it on the motorway for higher speed testing.
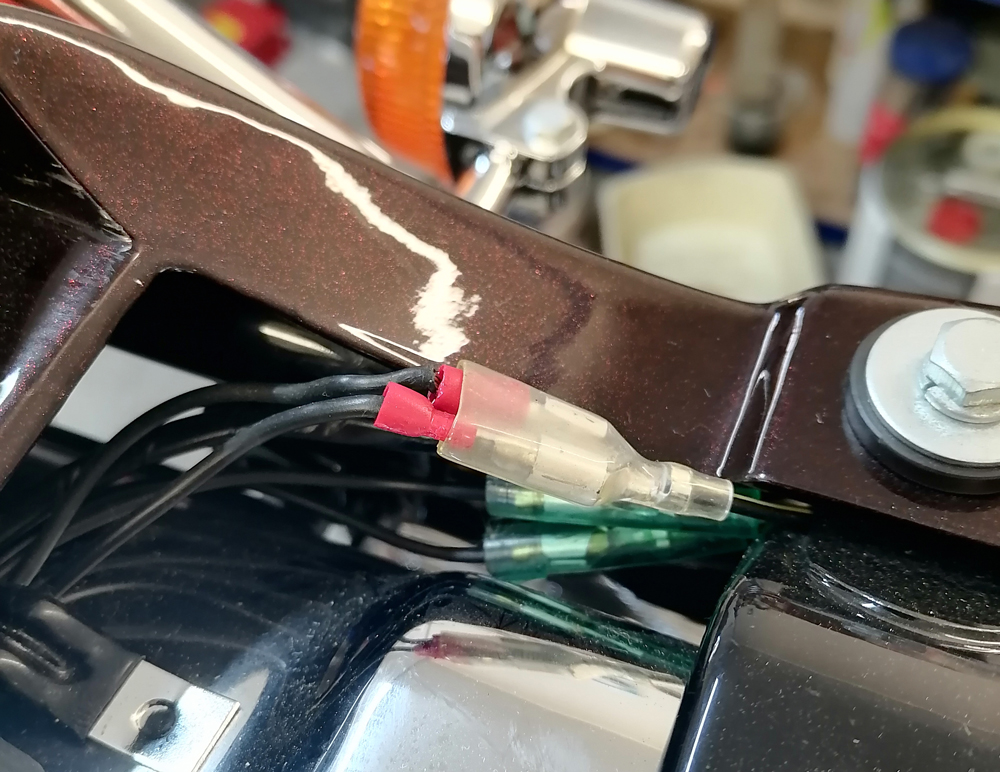
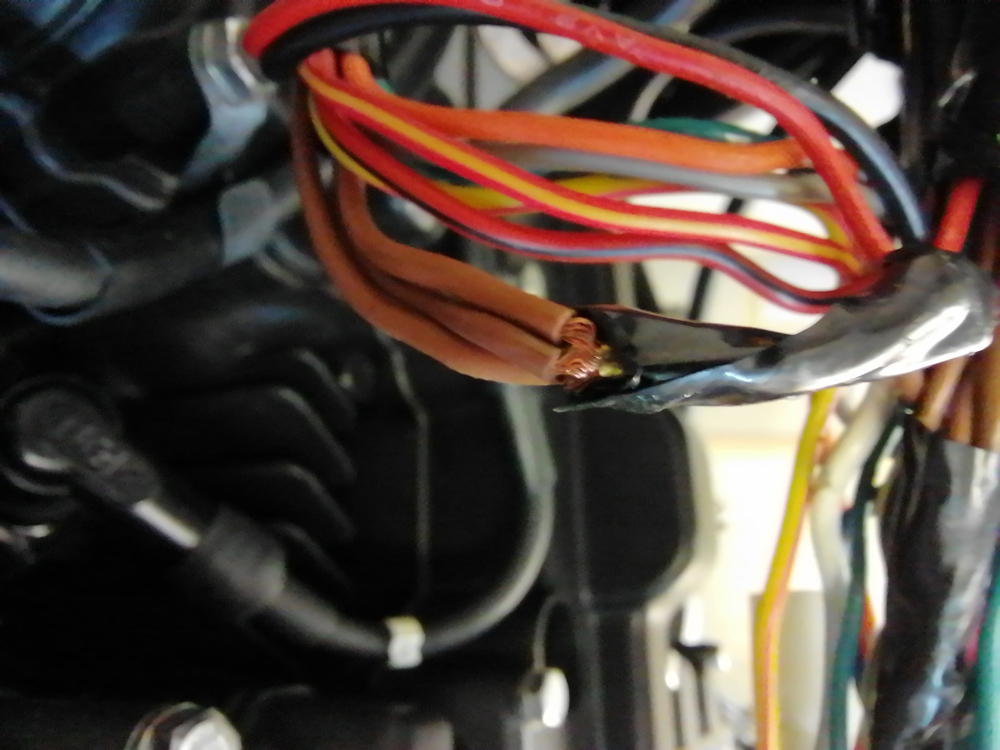
Poor wiring
Poor wiring plagued this motorcycle in every way, which was why the sealed beam headlight blew. We replaced this unit with a cheaper item which used bulbs, but it just blew bulbs the moment the lights were switched on. The horn wouldn’t work and the brake light blew bulbs intermittently. When we looked through the wiring it was three different wiring looms from completely different motorcycles. The “engineer” who “restored the motorcycle had used cheap bullet connectors with genuine Japanese connectors and had even wired three wires into the loom without any kind of connector. The twisted wire joining of three wires into the loom took ages to fid as it was buried in the loom and covered with wiring loom casing which we had to split to find the problem. It is easier to just rip our the wiring loom, replace it with the correct one and to rewire the whole bike, however the owner didn’t want us to do that, they wanted to just get everything running. We will never do this type of work again, we will tell the owner to collect the bike and pay us up to that date.We fixed the electrics so they worked and they will continue to work, but anyone trying to work on the wiring in the future will seriously struggle. Where the “engineer” had cut the powder coat off the frame to earth the machine, the powder coat hadn’t bonded to the frame, as it was a very cheap and nasty job they’d done on the frame. This machine will only ever degrade very rapidly and the powder coat will cause a lot of future problems with the frame.
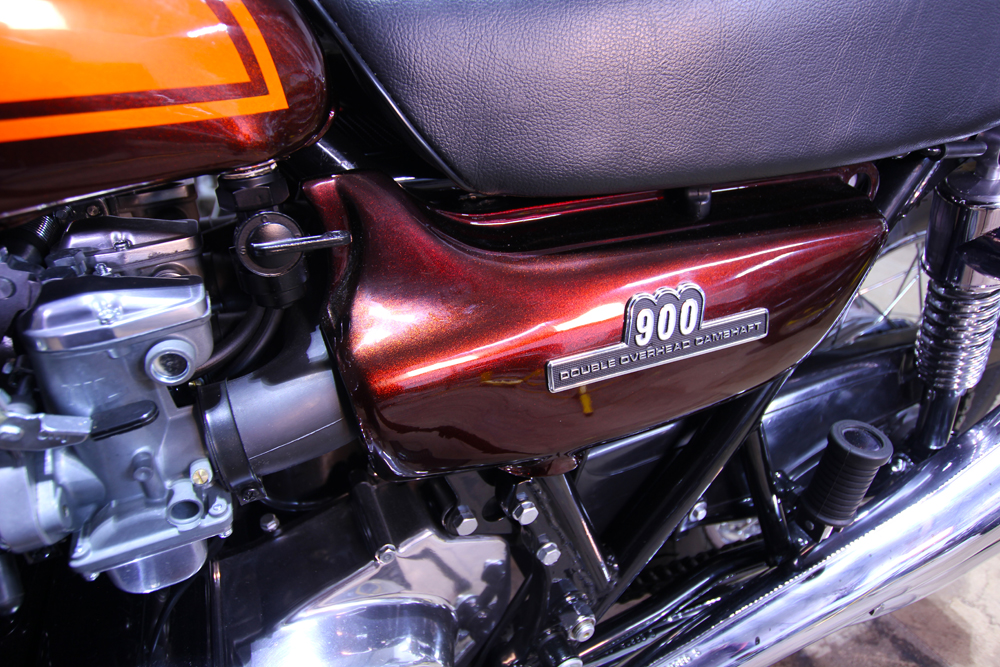
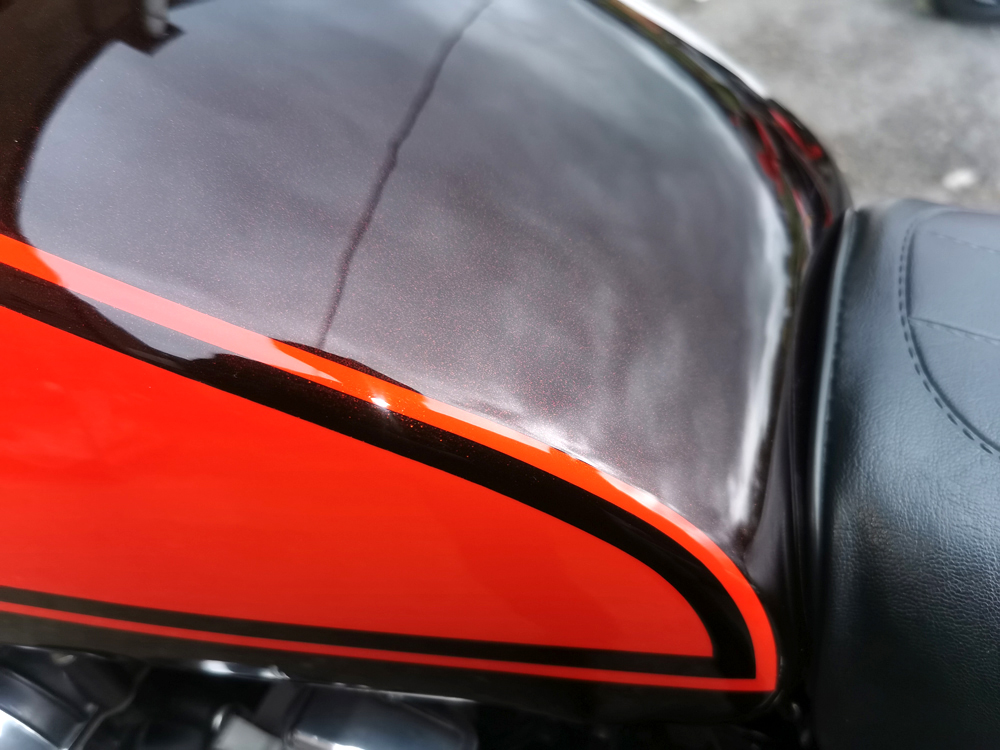
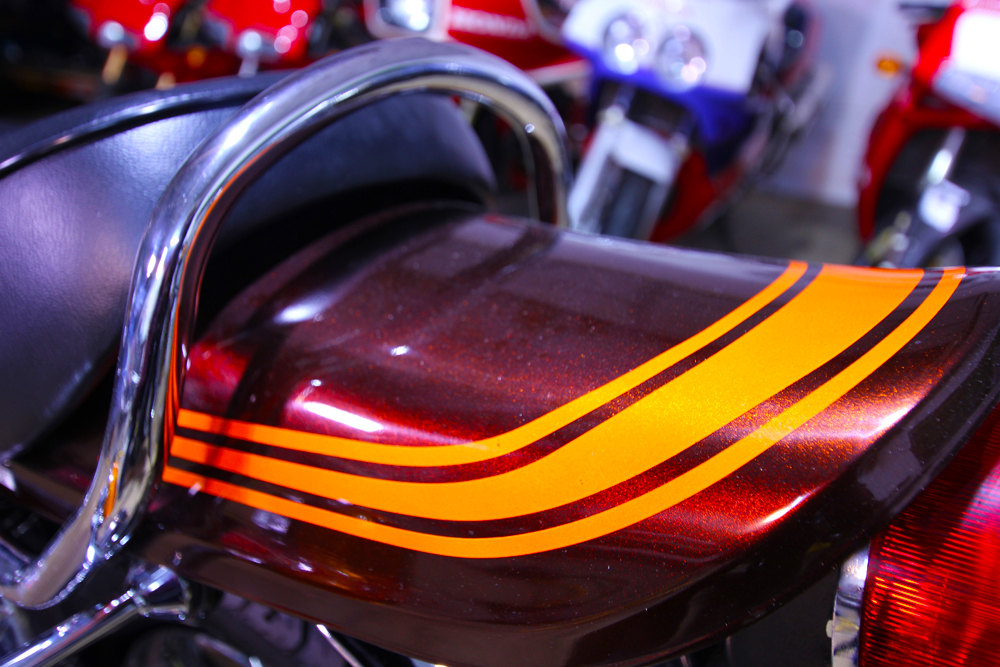
1972 Kawasaki Z1 900 correct colours
1972 Kawasaki Z1 900 correct colours for the bodywork is a contentious issue. This machine was only ever made in the candy rooter and orange colour scheme you can see in these pictures. The replica bodywork comes already painted and the paint is really atrocious. Candy is a base colour, orange in this case sprayed over a white first coat. The root beer is then sprayed over the orange and each pass of the spray gun at this stage will darken the colour, as candy is pretty much an ink. This colour can be quite flat and almost a brown or even black in some lights. Even in some sunlight it can seem quite flat, but once it’s caught in the light, it really pops. The colour has an incredible depth with a myriad of sparkling colours, a reddish hue that can even graduate into a golden brown. The shape of the orange is also quite complicated and lines taper, but it doesn’t look like they do. There are very few painters who can get the colour and design correct on these machines, when it’s right it’s right. The replica bodywork is awful, the dimensions of the tank are all wrong, both the orange, root beer are dreadful and the design is completely wrong. To correctly paint genuine bodywork is very expensive and takes a long time to get it right. When you put both bikes together the correct one will leap out and the incorrect machine will just look and feel….wrong.
Kawasaki Z1 900 bottom ends
Kawasaki Z1 900 bottom ends are bomb proof and were very popular choices in the 1970s and 80s on the drag racing scene for that reason. When we took the bike on the motorway for a fifteen mile cruise at 70 plus MPH we discovered, to our horror, that the bike started spewing oil all over the back wheel. We showed the owner, tried to find a blockage in the oil breather, but there was only one course of action. The crest fallen owner agreed that we should strip the motor again and examine the bottom end, as we advised in the first place. He also agreed that we should blast and paint the motor correctly while it is in pieces. We stripped the motor and removed all studs so we could blast it for painting. We found a snapped drill bit in one of the exhaust stud holes, which was also cross-threaded; that took some time to remove. We had to remove all of the valves again and make plates to protect the crank case, and all other, mating surfaces from being damaged. Once it was blasted, the plates we’d made were removed and we spent days cleaning the motor to ensure there were no traces of media in the motor. The motor had clearly been assembled after having filled up with water without having ever been cleaned. The sludge had blocked many of the oil ways in the bottom end, which caused the crank case to pressurise and spew oil all over the back wheel. The oil pump was scored to pieces, so we had to completely rebuild that. The bike ran well, but we pointed out that we couldn’t guarantee the front left cam carrier cap and got the owner to sign that they would not ride the machine because of this problem. Prior to rebuilding the motor, with the head still removed, the owner refused to pay for us to remedy the cam carrier cap problem and accepted that the bike was not safe to ride in that state. They now have it as an ornament in their office.
Poor investment
His poor investment wasn’t a bargain at all, as this “classic” cost him more than buying a proper investment grade 1972 Kawasaki Z1 900 from us in the first place. He was furious with us because the bike cost him a fortune and he just wanted a bargain. It was inconceivable to him that his judgement wasn’t better than ours and he believed we must have over charged him. We reported to him moment by moment what we found, we photographed and wrote up the problems and he even came to our workshop to witness what we had found. When he paid the final bill he was incandescent with us, even though we “fixed” his “bike”. He decided we were the problem, not the “engineer” who “restored” the bike in the first place, a case of shooting the messenger and his own poor choices. Finding the cause of the problems was also really challenging, because we didn’t know where to start to look until we understood how poor the original work was. Once we knew to what lengths the original “engineer” would go to bodge the bike, we were still shooting in the dark. At least if the job is done properly, you can use a process of elimination to find the fault or faults. I’m sure for the price of an investment grade, really nice, genuine 1972 Kawasaki Z1 900 he could have invested in a much better sculpture through an art gallery, which would appreciate in value far more than his Z1. We are relaying this sorry Kawasaki Z1 900 purchase lesson so you don’t make the same mistake, this is so typical of what is in the market. This is why we have created the investment grade classic motorcycle, to protect buyers from this false economy. You will never meet a nasty conman, they are always nice, charming and have lists of credentials that have no bearing whatsoever on classic motorcycle restoration. If you want to invest safely in an investment grade 1972 Kawasaki Z1 900 contact The Motorcycle Broker using the form below, or contact us in the usual ways.

- Most collectible Ducati 916 SP - June 20, 2024
- Classic Motorcycles: To ride or not to ride? - June 17, 2024
- Classic Motorcycles: To ride or not to ride? - June 17, 2024


another fantastic article.